Are you new to AdSense? Do you wish to resolve your WordPress website’s ads.txt file problem? Well, there is one simple solution to this issue.
To add ads.txt file in WordPress, you can either use a specific plugin or an AdSense management plugin.
Or the file can alternatively be uploaded straight to your WordPress website’s root directory (cPanel).
So, attentively read the article to find the answer quickly.
What is ads.txt file?
An IAB Tech Lab project called Ads.txt or Authorized Digital Vendors helps to verify that your digital ad inventory is only sold by sellers (like AdSense) who you’ve designated as authorised.
It aids purchasers in spotting counterfeit inventory and promotes your confidence in the advertisers.
You are providing advertisers with the details they require to choose the appropriate supplier by installing the ads.txt file.
How to add ads.txt file in WordPress website?
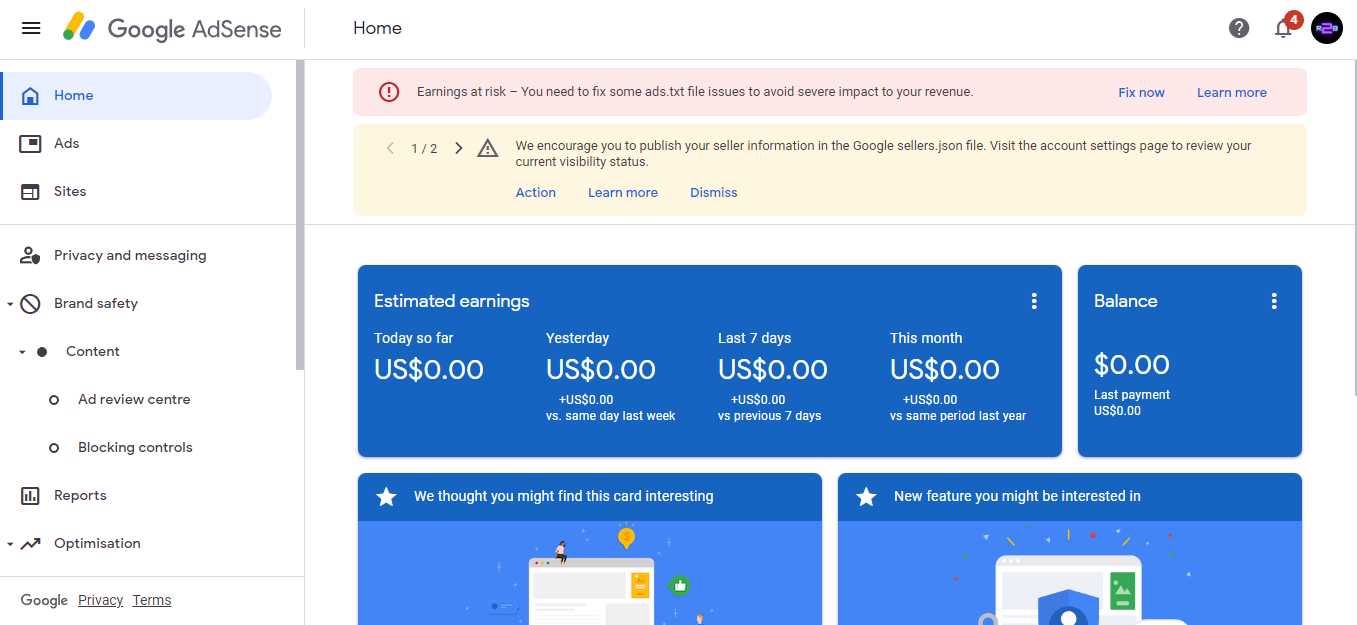
You must sign into your Adsense dashboard to create an ads.txt file. An alert will appear here at the top. Thus, click the “fix now” button to reveal the “Create an ads.txt file for…” message, and then click the Down arrow.
To download, click on the Download button. Your ads.txt file is downloaded automatically. it’s that simple.
How to add ads.txt file using a plugin
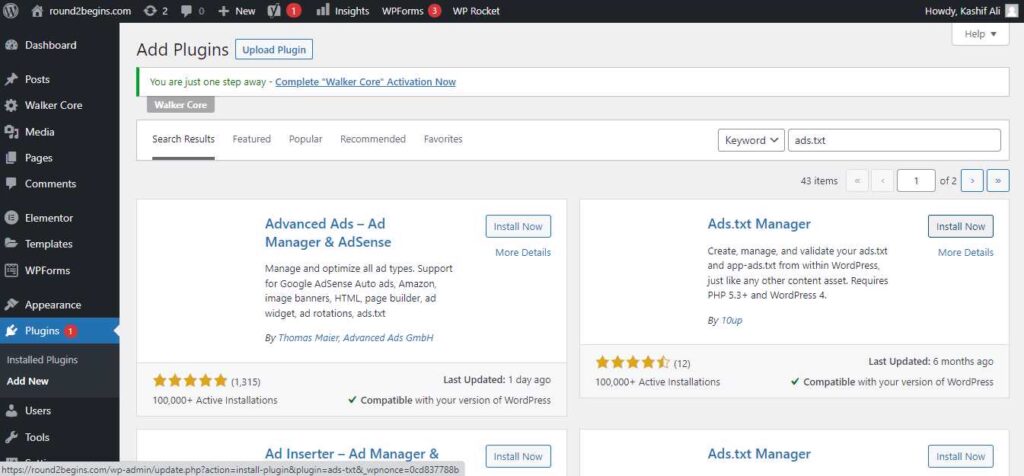
You must enter into your WordPress dashboard and visit the plugins section in order to fix the ads.txt file.
After that, click the add new plugin button and type ads.txt into the search box.

Plugins like 10up’s Ads.txt Manager are now visible. Simply install and turn on this plugin.
After that, in the WordPress dashboard’s setup section, you will notice a new option called ads.txt.
All of the file’s content should now be copied and pasted here, and the code saved. You have now uploaded the ads.txt file to your WordPress website.
How to add ads.txt file in cPanel (without using a plugin)
You don’t need to install any plugins in order to upload the ads.txt file directly to the root directory of your WordPress website.
Step-1: Log in to your hosting C-panel and select the file manager option to accomplish this.
Step 2: At this point, you must open the public HTML folder, which contains all of the information for your website.
Step 3: At this point, you must make a new file and paste the code inside of it (the contents of the ads.txt file that you downloaded earlier). Here, you must save the file with the name ads.txt.
You are now aware of both methods for uploading ads.txt files to WordPress.
Please feel free to ask us any questions in the comment section if you have any. Follow us on social media to stay updated. Learn more informational blogs here.


