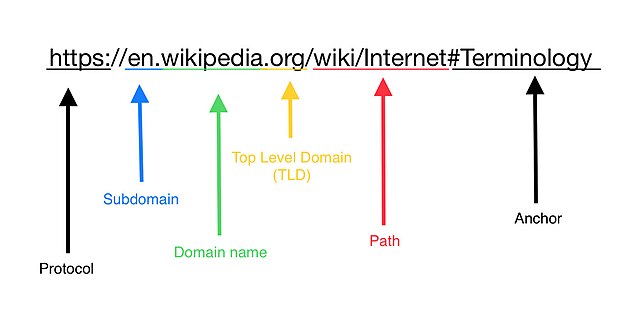
Sometimes you might have noticed that your website isn’t showing www in its URL. However, when you double-click the URL, it may show up (or may not). The “www.” is a subdomain, and that’s the trick. In this way, “www.example.com” is in fact a subdomain of and theoretically separate from the main domain “example.com”. However, the subdomain “www.example.com” is configured to direct you to the same location as the main domain “example.com” by convention and to avoid confusion.
Sometimes you might need to modify the URL of your WordPress website for a variety of reasons. Let’s use the examples of a brand change or the necessary migration from HTTP to HTTPS for security reasons. Naturally, there is also the issue of changing a website’s URL from www to a bare (non-www) URL.
In the tutorial that follows, I’ll explain why you might want to add www in your WordPress URLs and give you a few examples.
Why Use the WWW
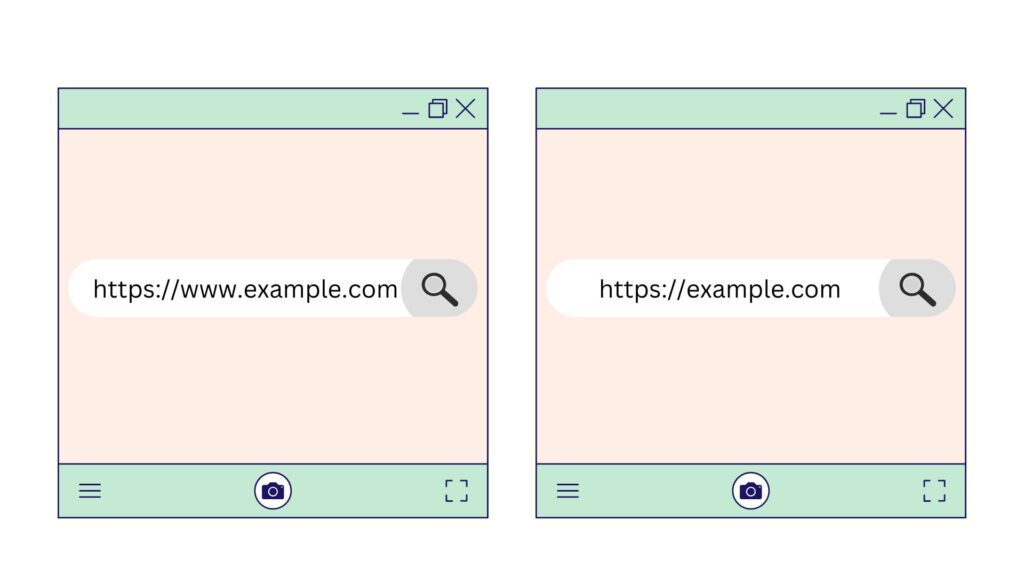
It may not appear that there are many differences between the non-www URL and the www URL. Both are connected over a secure channel, as shown by the https:// prefix. Furthermore, they each employ a short and to-the-point .com domain name. Larger websites with subdomains are required to utilize www. What matters most, in the end, is how visitors’ browsers handle cookies.
Browsers that use www store cookies for the whole website, including all subdomains. Without www, each subdomain request necessitates the storage of a distinct cookie by the browser. As you might expect, the procedure is incredibly ineffective and reduces the loading speed of a website.
Apart from that one (important) reason, there isn’t much of a distinction between www and non-www.
Adding the WWW to WordPress
There are a few methods available for individuals who want to add www to their WordPress website, regardless of whether it is a site with several subdomains.
Just take care. If you make a mistake, you can experience the “white screen of death” of WordPress. The switch from non-www to www may be straightforward to implement, but it will have a significant impact on your website. It will modify:
- the URL displayed to visitors on the front end.
- The login URL to access the backend of WordPress for you and other users.
- the performance of all links leading to the website, both internal and external.
Please carefully read the following guidelines before adding www to WordPress.
1. Include WWW in WordPress’s Admin.
Visit Settings > General in the WordPress dashboard. You must update these two fields on this screen.
After “https://,” type www. and then click Save Changes.
You should now be immediately logged out of WordPress. If not, you should log out on your own.
Put your admin URL into the browser’s address bar to log back in. However, this time, include www. in it.
You need to clear the server cache if you still have trouble logging in after doing this. Use the next option if the problems persist.
2. Include WWW in the file wp-config.php
Use the wp-config.php file if you wish to hard-code the change in the domain name of the website.
Open your file manager or FTP manager by going to your control panel. Find the wp-config.php file and then add the following lines of code:
define( ‘WP_HOME’, ‘https://www.example.com’ );
define( ‘WP_SITEURL’, ‘https://www.example’ );
Just be sure to substitute your domain name with example.com. Save your edits after you’re finished.
Note:
The domain name settings in the WordPress dashboard will never take precedence over the changes in wp-config.php. It’s likely that someone hard-coded the non-www URL into this file if you had trouble adding www to WordPress and clearing the cache didn’t help. Look up the lines mentioned above and change them.
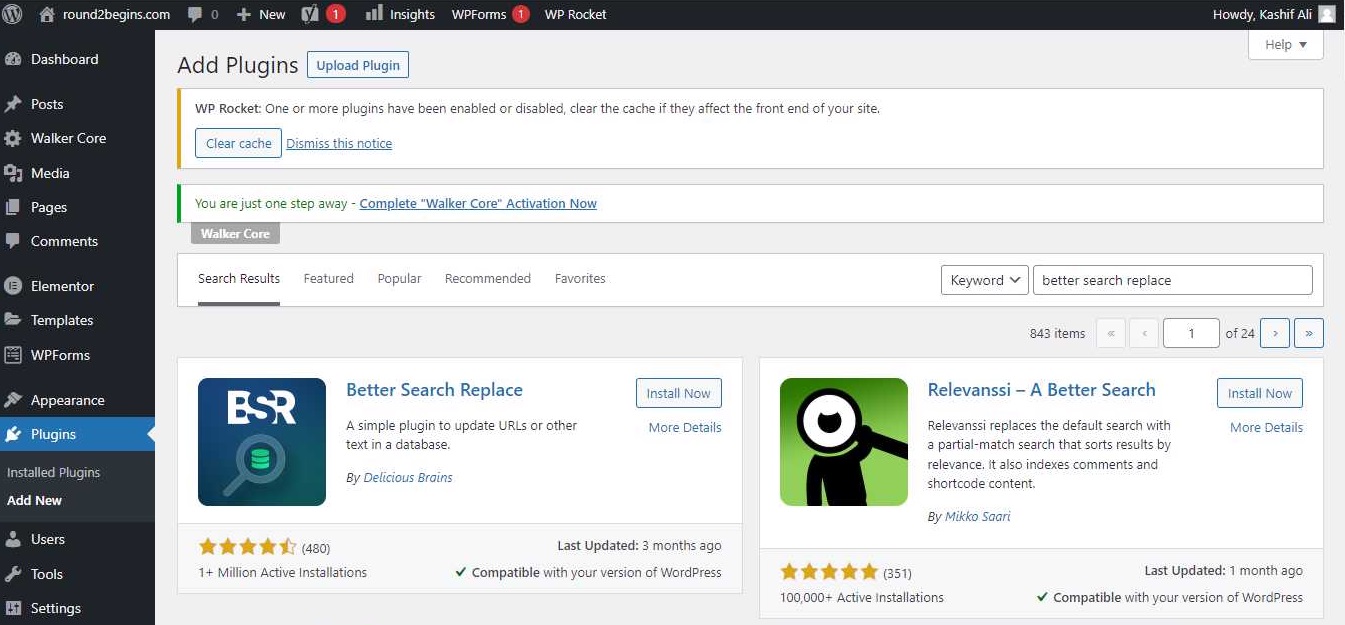
3. Use the database search and replace function.
You might also need to run a search and replace on the database to replace any other instances of the old non-WWW URL with the new one, depending on your plugins and theme. The search and Replace plugin is the most convenient way to accomplish this.
Learn how to do a search and replace in WordPress website here.
Why a 301 Redirect Should Be Used
Why not simply develop two versions of your website, one for www and one for non-www? Ain’t that the simpler option?
The problem is this:
Having a website that is available in both www and non-www versions is not desirable. There are several bad effects of this.
Google first indexes website content and links it to the complete URL. If you establish your WordPress site with a non-www domain and decide to change it after a year that you want to, Google will have to index the www version of it from scratch, and you will lose all the valuable link juice you have built up.
SEO issues would also arise if a www mirror version of the non-www website was created. Google bots are unaware that your goal is to capture all traffic, whether it comes from your website’s www or non-www address. When Google bots discover this, they will attempt to simultaneously rank both versions of the website. Your content will therefore not only compete with itself but also pay a price for being shown in search results as duplicate content.
Conclusion:
The bottom line is that you should decide whether to include www on your WordPress site or just omit it entirely. But decide and then stay that way.
Once you’ve decided on your URL, implement a 301 redirect.
Set up a 301 redirect in your domain management to direct traffic from non-www.
Thus you can direct all the traffic to a single URL, whether it is coming from a non-www or www URL. As you now know, there are very good reasons to utilize www on large websites with subdomains. The decision is yours to make regarding everyone else. Add www to your WordPress site if you enjoy the way it appears or wants to be absolutely certain that people who know your brand name can find you. Just be sure to adhere to the instructions above to guarantee correct implementation.
Read more Know-Hows here. Or follow us on social media.